A lot of you have shown great interest in my tone chart tutorial and I’m so happy you guys found it useful. So before I start creating other types of videos, I should expand on the tone chart technique and show you guys another one of secret tricks. In this tutorial, you’re going to how to take a bunch of layers and compress them into a single curves adjustment layer. This is a very efficient way of color grading and if you’re interested, keep reading and I’ll show you how it’s done.
The Amateur Way of Color Grading in Photoshop
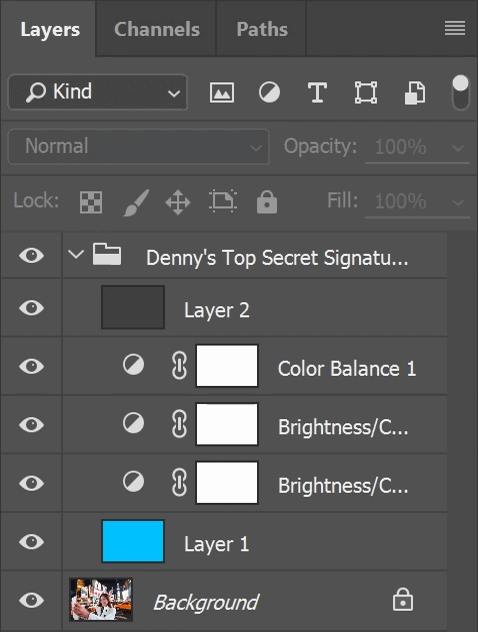
A lot of people add effects and color grade their photos using a bunch of layers. It’s not the most efficient way of doing things. Here’s an example of an effect created in a really amateur and inefficient way. It has lots of layers and everything was by trial and error. You should avoid color grading using random layers because it’s inefficient and dangerous to your image quality (I’ll tell you why later).
Tone Matching Photoshop Tutorial
In this tutorial, you’ll learn how to convert all these layers into a single tone curve adjustment via tone matching. Keep in mind that the tone curve can’t do stuff like changing the saturation, shifting the hues, adding vignettes or noise, etc. It can only make changes to the tone and add tints to different tonal areas.
Step 1
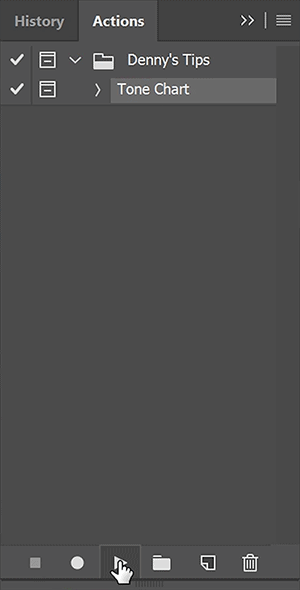
So now that you know the limitations of the tone curve, let’s start the tutorial. First, you’ll need to add a tone chart to your image. You can do this easily by downloading the Tone Chart Photoshop actions. After downloading, simply doubleclick on the ATN file and you can find it in the Actions panel. If you don’t see the Actions panel, you can find it by going to Window > Actions.
Select the Tone Chart action then hit the play button on the bottom of the panel. This action will create a tone chart for us automatically. If you want to learn more you can learn watch the tutorial about it.
Step 2
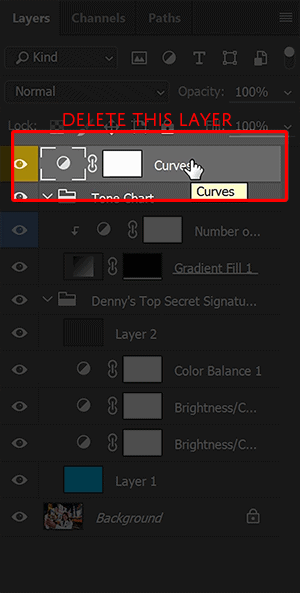
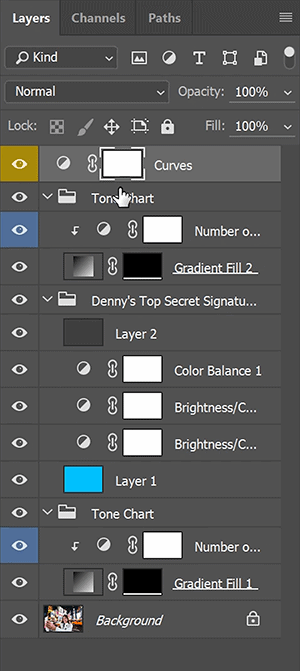
We don’t need the Curves adjustment layer so delete the layer by selecting it and hitting the delete or backspace key on your keyboard.
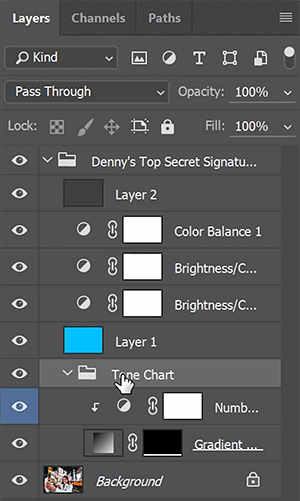
Drag the Tone Chart layer group so that it’s below all the layers you used to create the effect.
Step 3
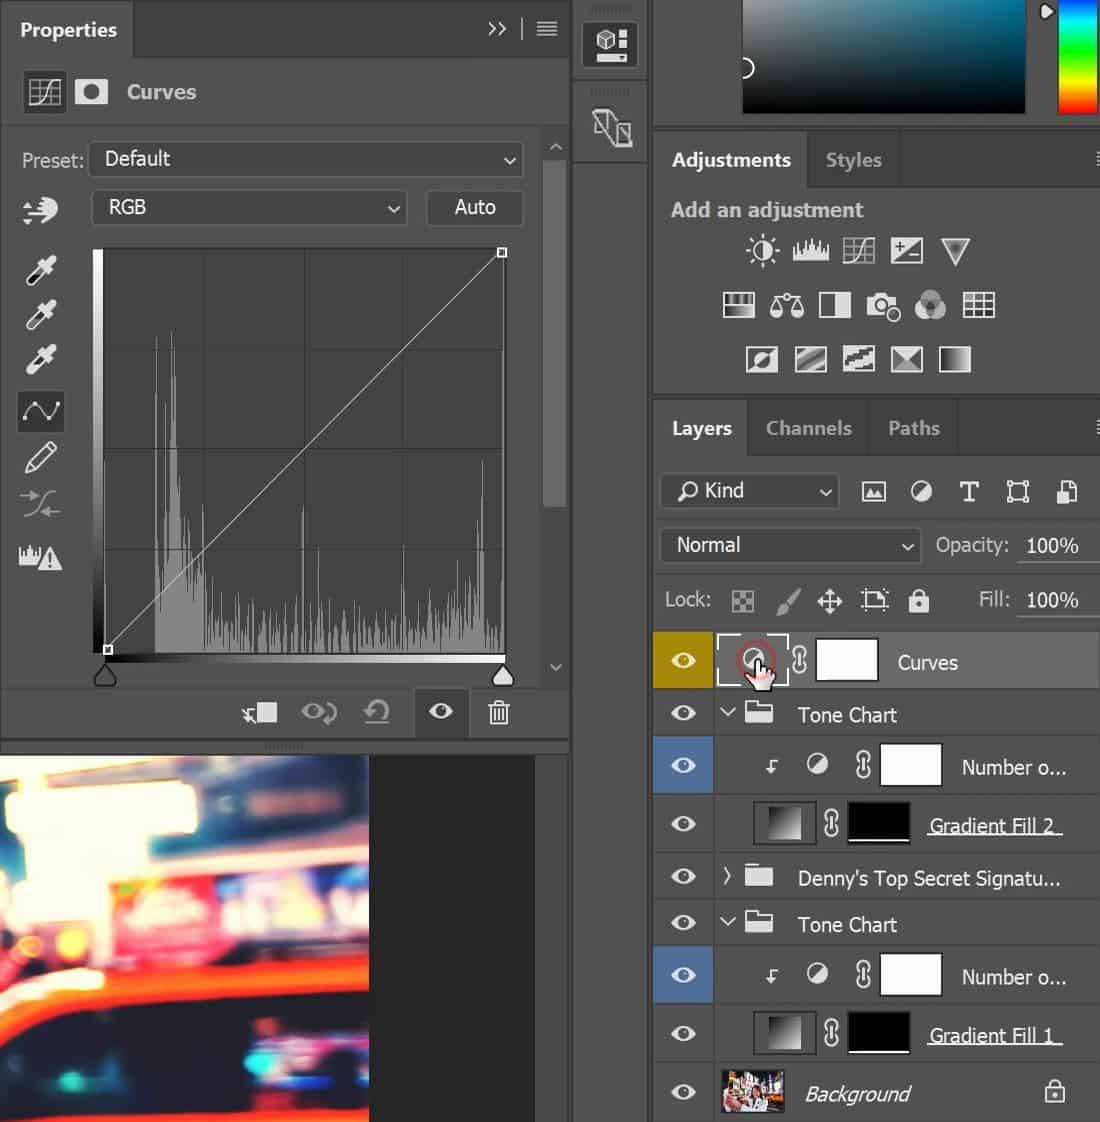
So now you can see that this tone chart is already telling us what color is in the blacks, shadows, midtones, highlights and whites…. Or simply put, the secret recipe for this effect. And we’re going to clone this effect into a curves adjustment layer.

Go to your Actions panel and play the Tone Chart action again. It should automatically place the tone chart and curves adjustment on the top of your layer stack.
Step 4
Select the Tone Chart group then use the Move tool by pressing V and then drag the tone chart up so that it’s above the other one like this. Make sure there’s no gaps in-between the two charts… if there is just press the down arrow key on your keyboard until the gap is gone.

Step 5
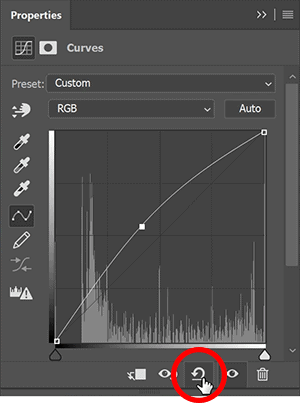
Now we’re going to make the top chart match the bottom with the Curves adjustment. There’s already a Curves adjustment layer created for you as the top layer. So select this layer.
Now when you make changes to this layer, it’s going to affect the entire image. So to make it so that it only affects the tone chart layer group below, click on this button. Now any changes you make will only affect the tone chart.
Step 6
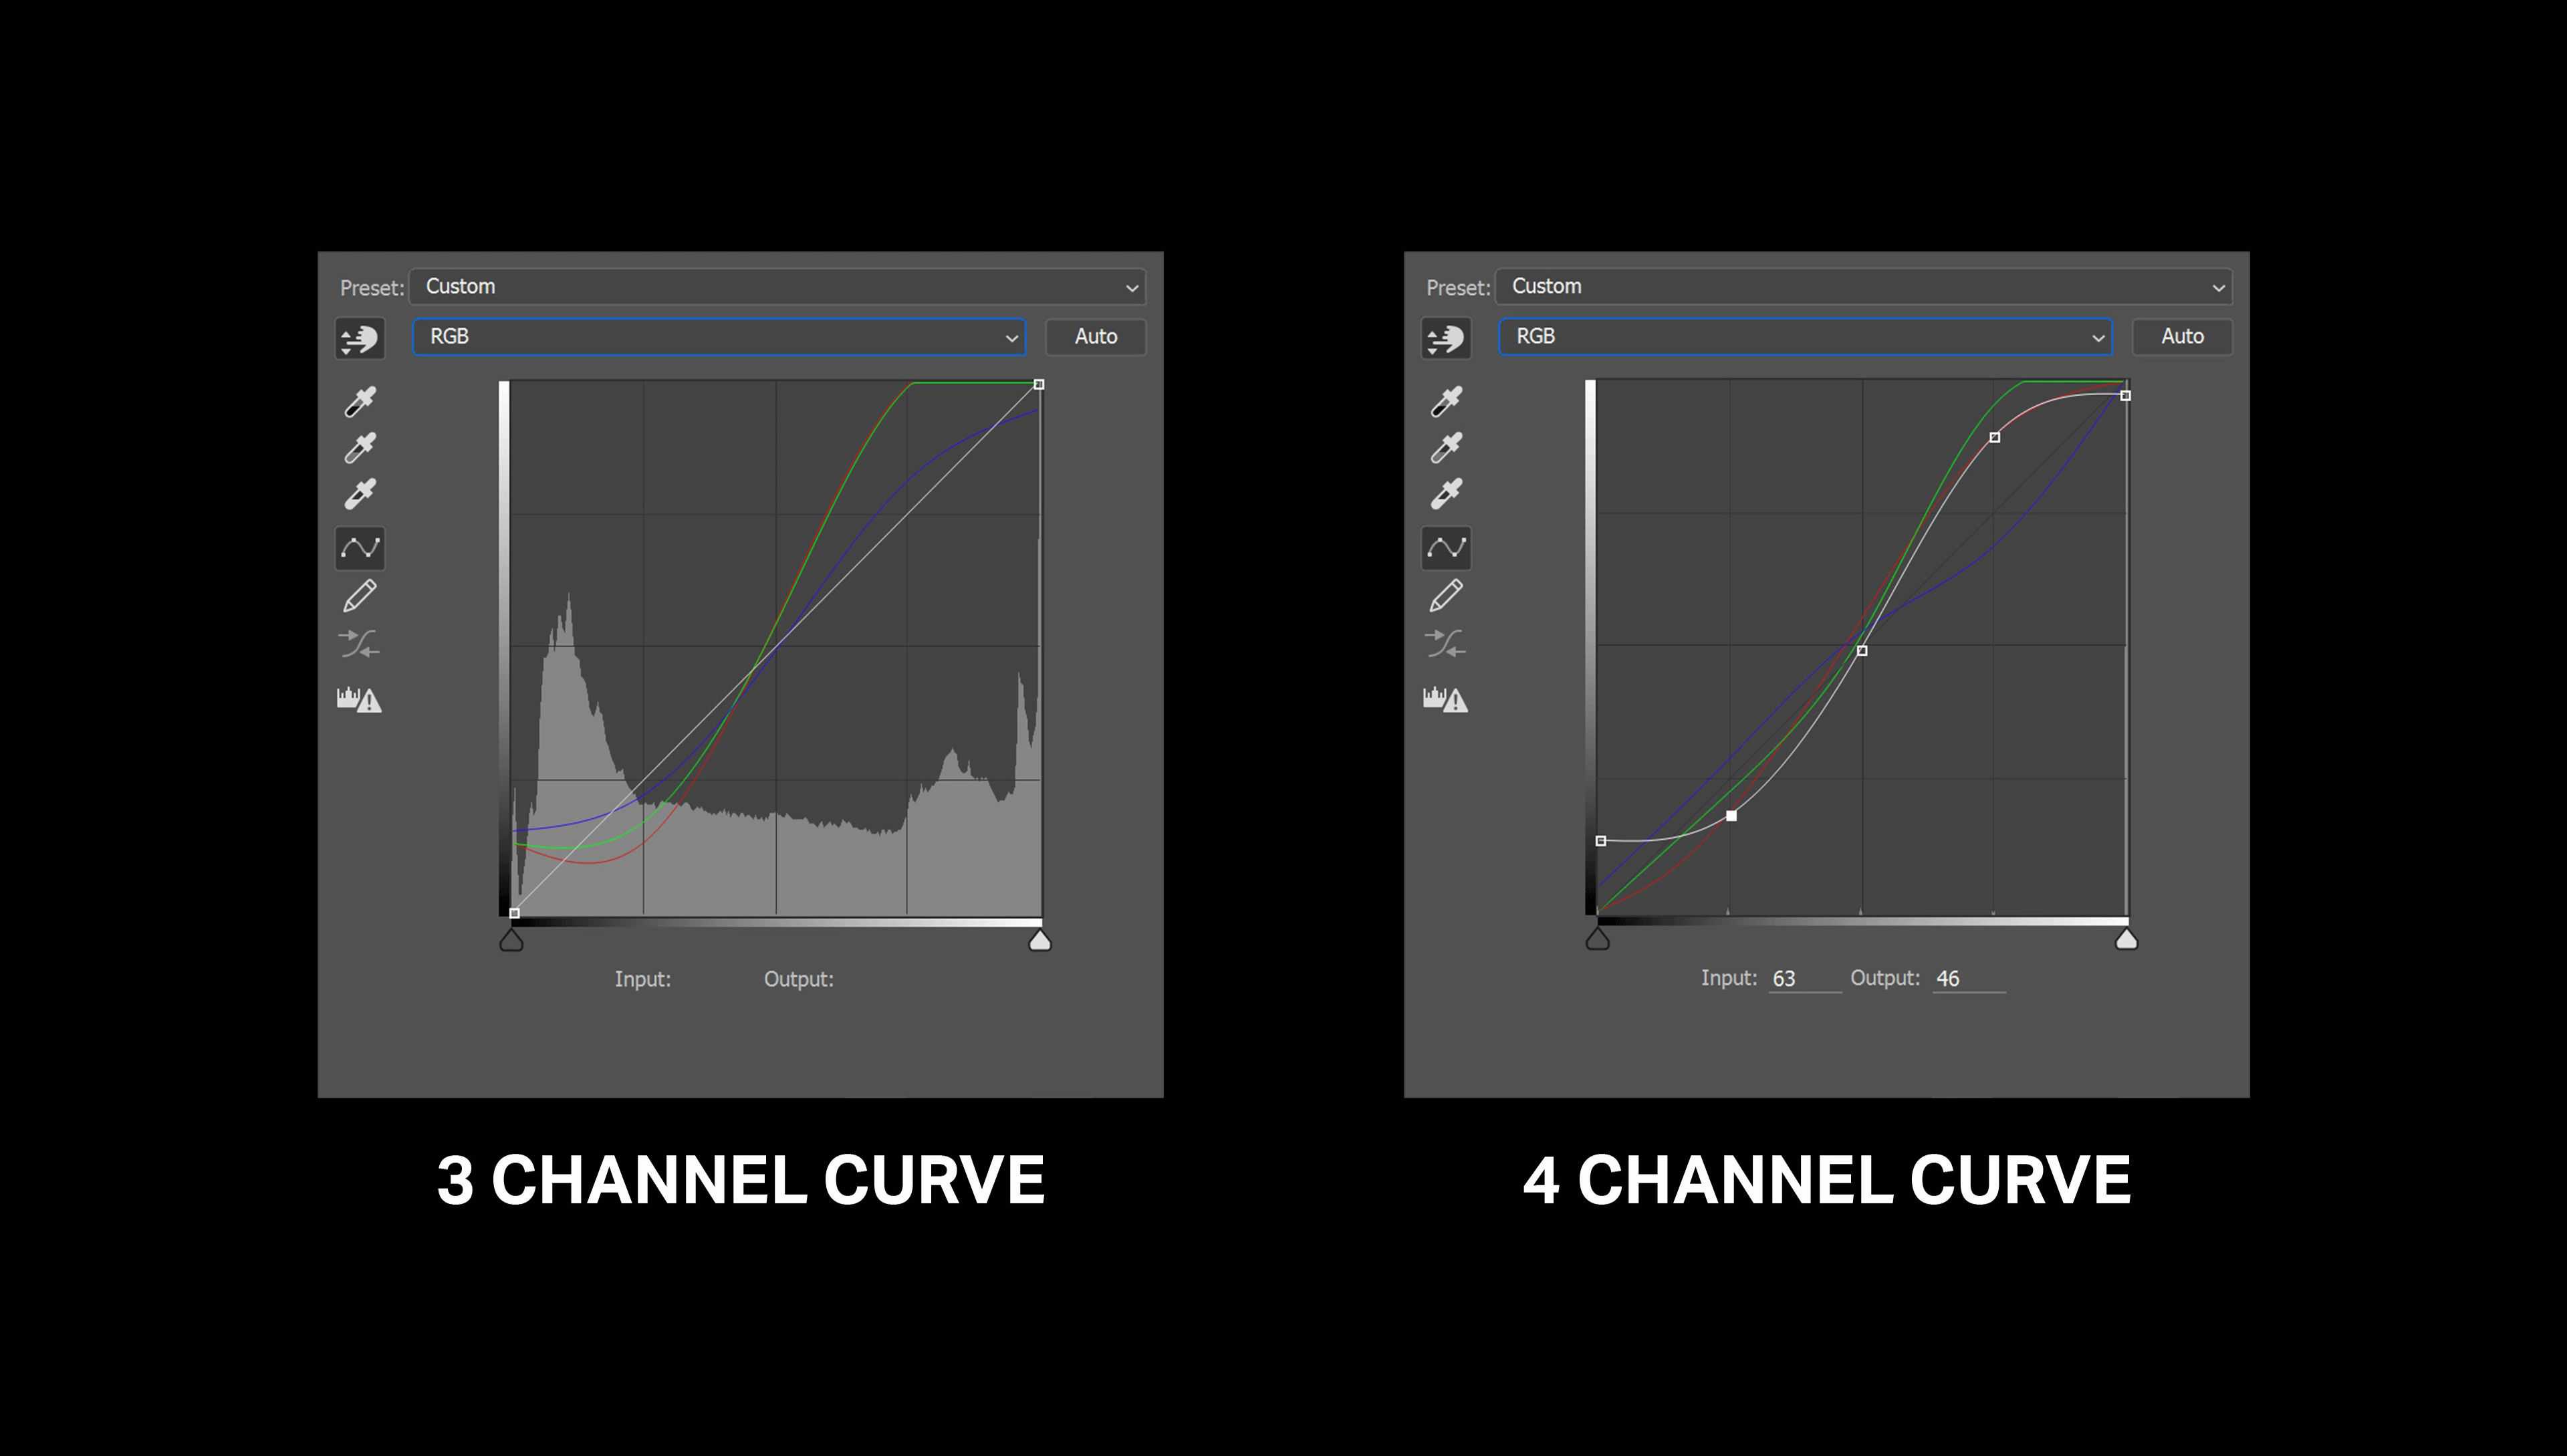
For the curves, we’re only going to use the red, green and blue channels. We’re not going to use the RGB channel. This is called a 3 channel curve because you’re only using 3 of the 4 channels. Compared to a 4 channel curve, it’s less proper and harder to understand when you’re looking at it, but you can get the same results and it’s easier to do when all you’re doing is copying an effect.
Step 7
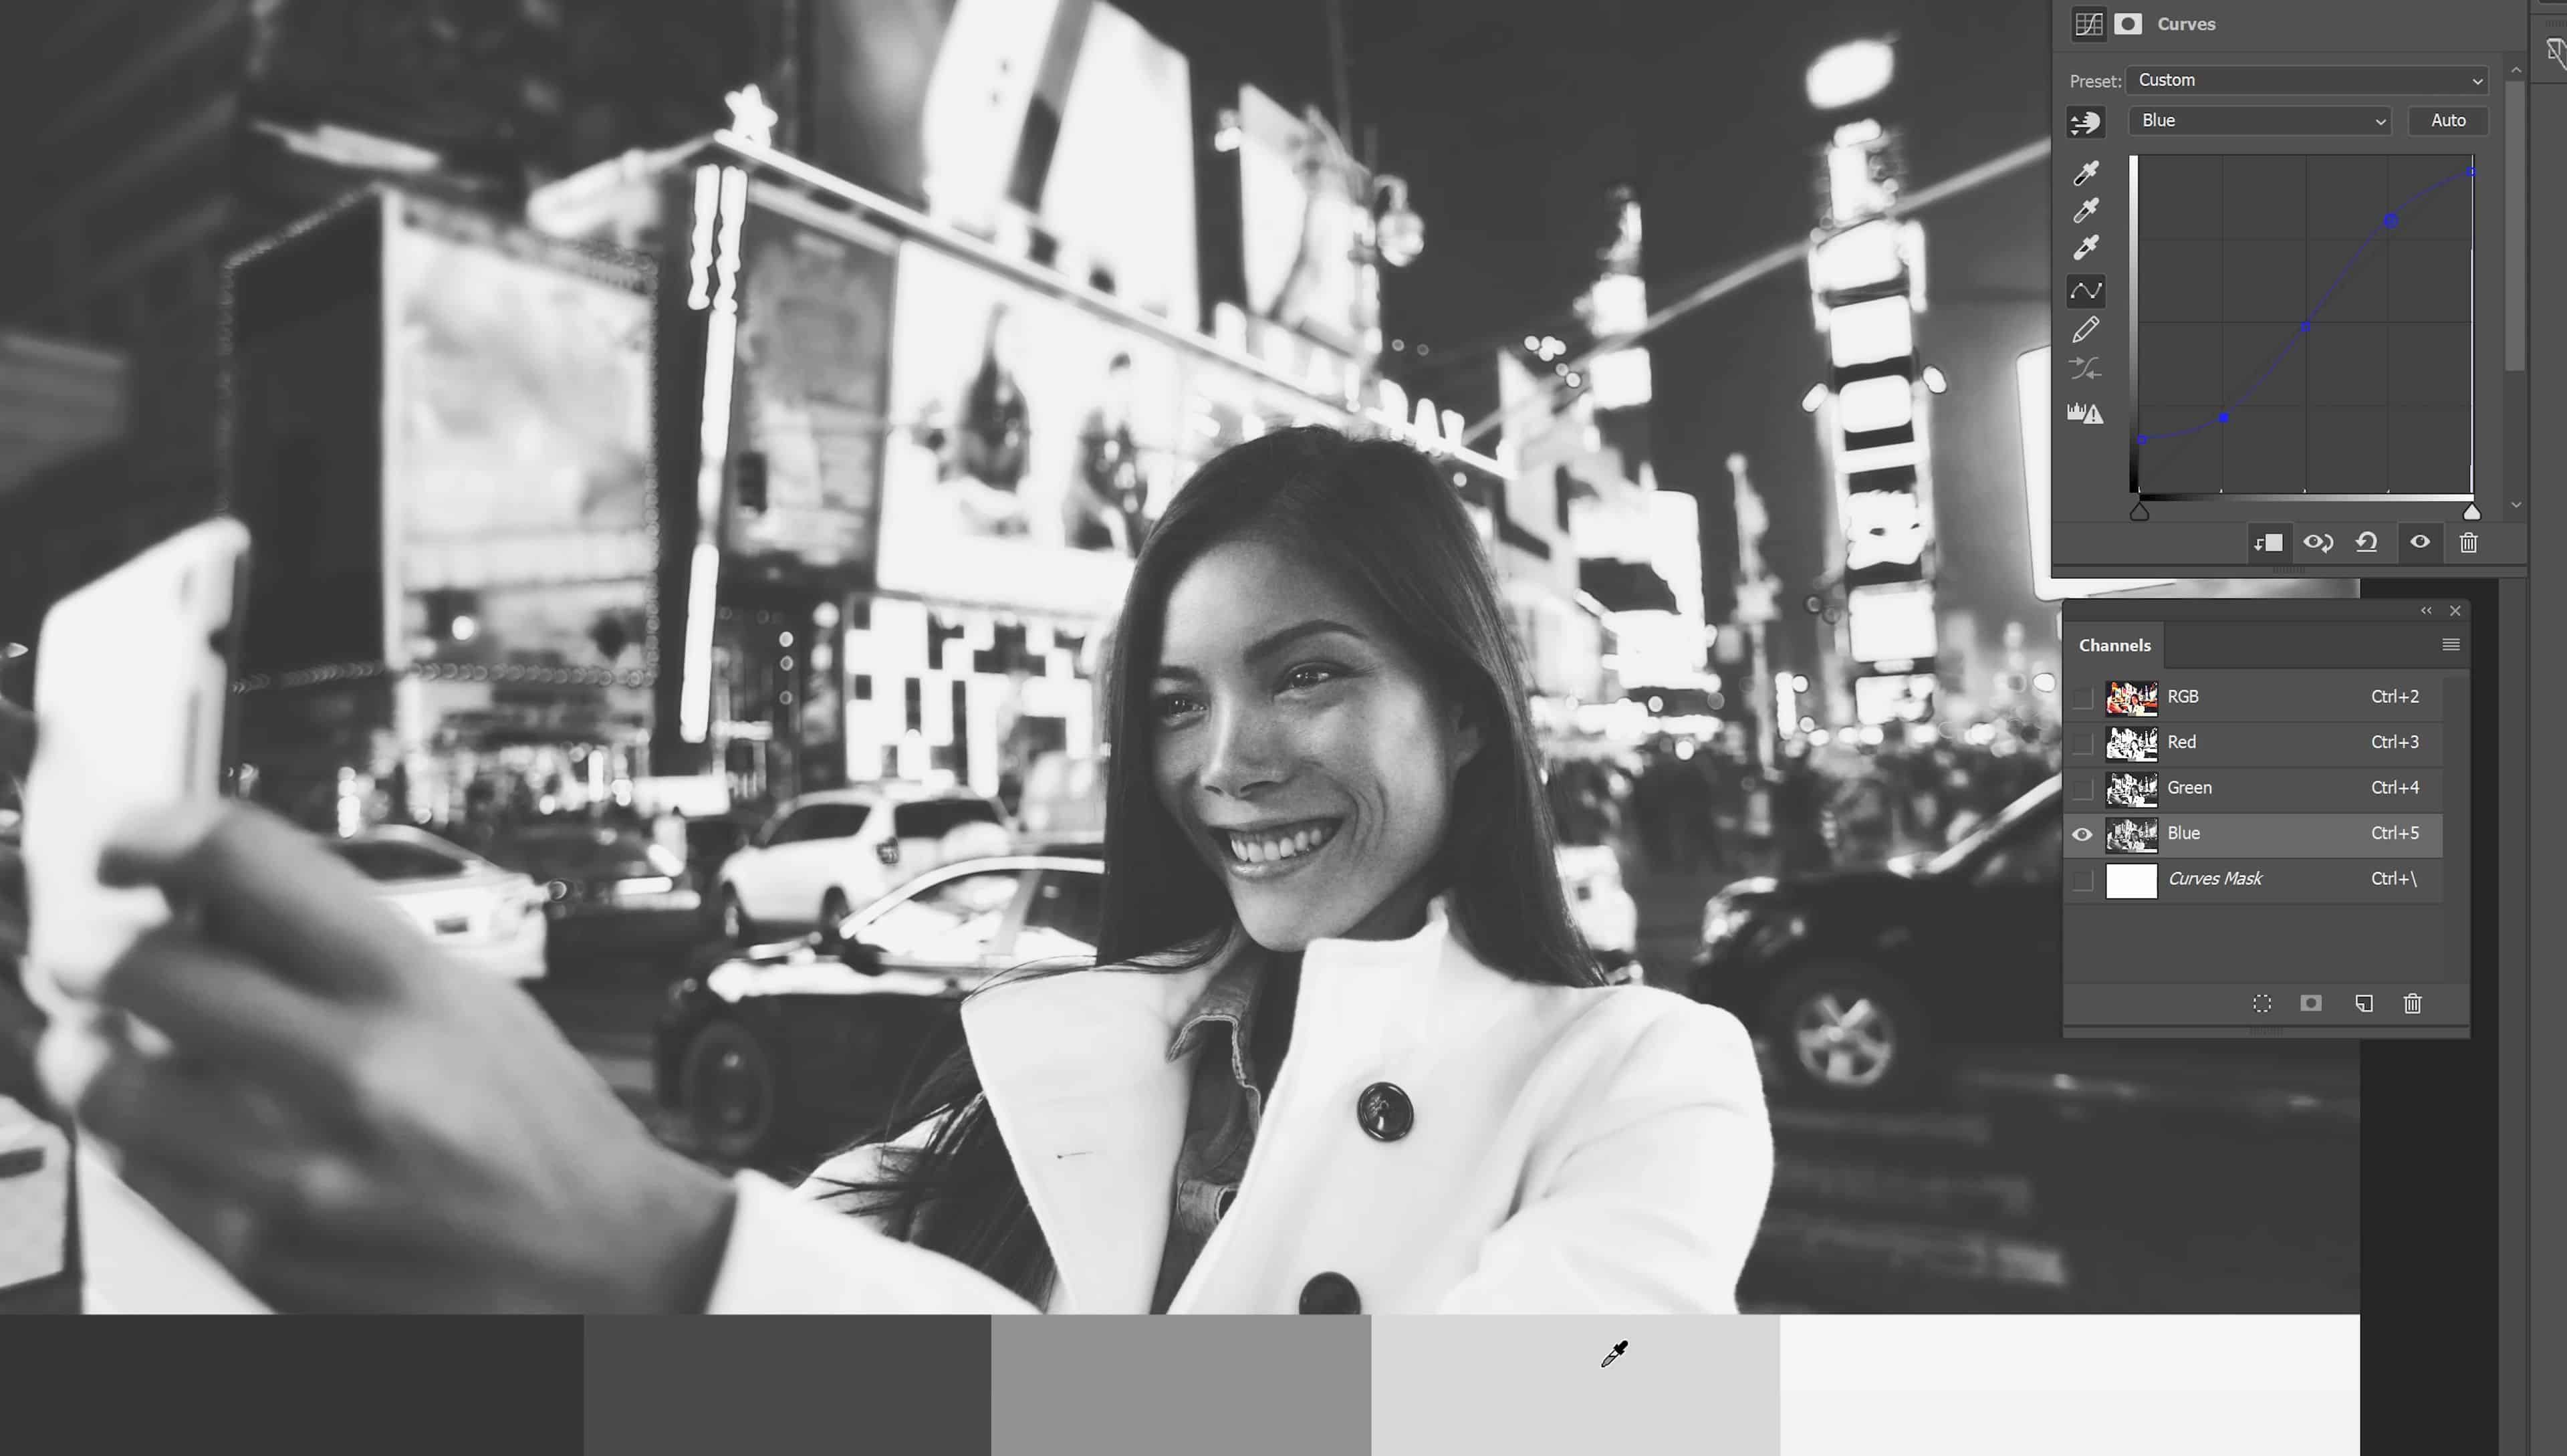
Anyways here’s the secret trick. Open the Channels panel and if you don’t see it, you can find it by going to Window > Adjustments. Select the red channel and now you’re looking at the red channel.
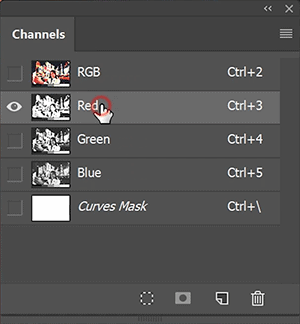
Now go back into the curves and switch to the Red channel.
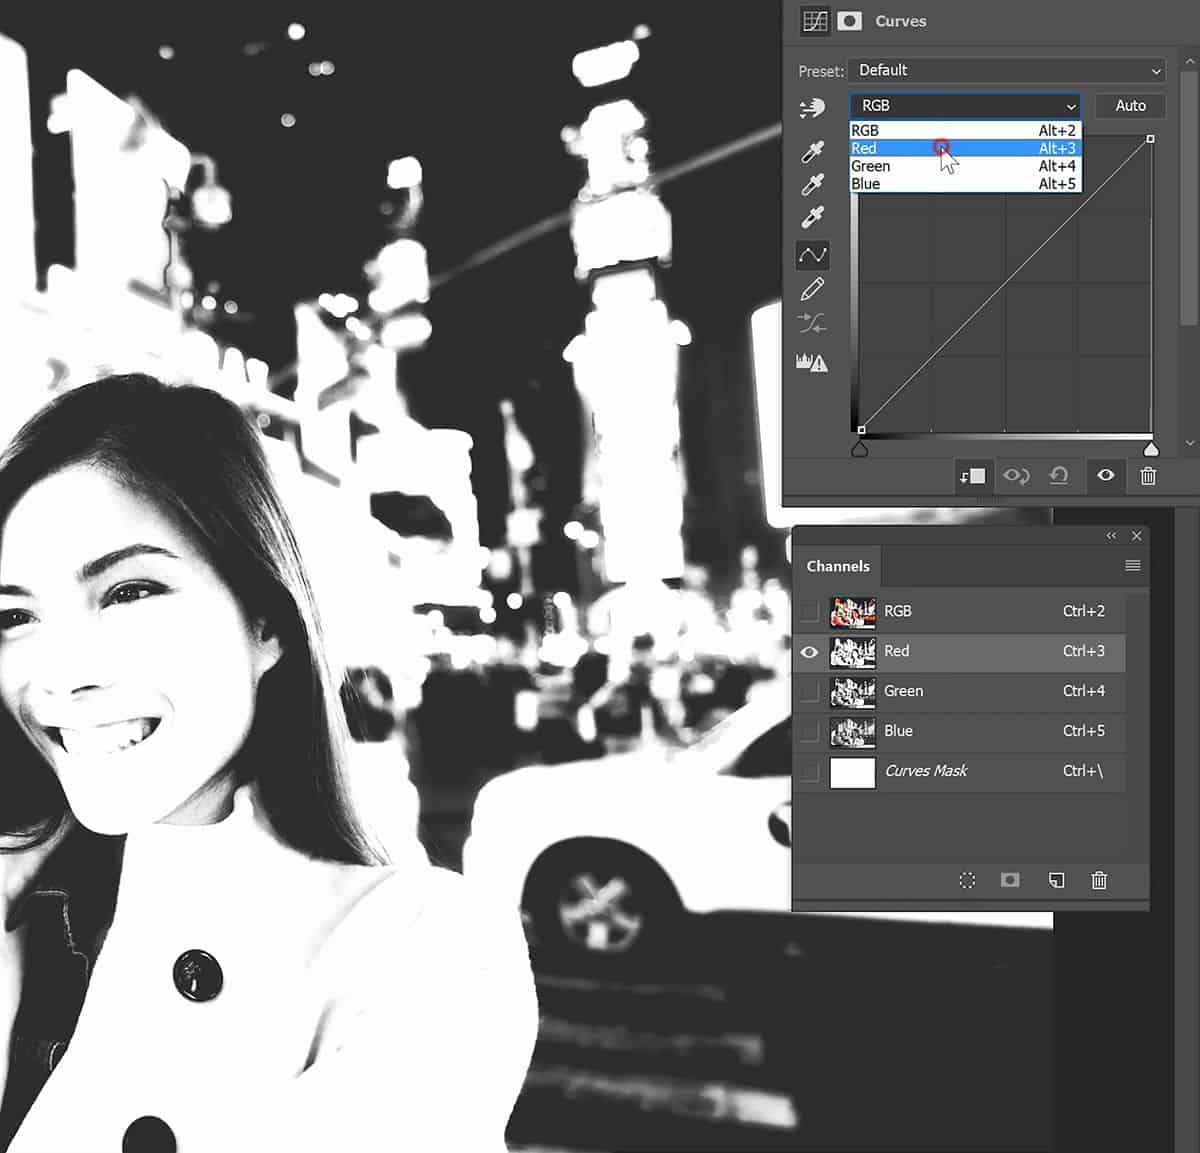
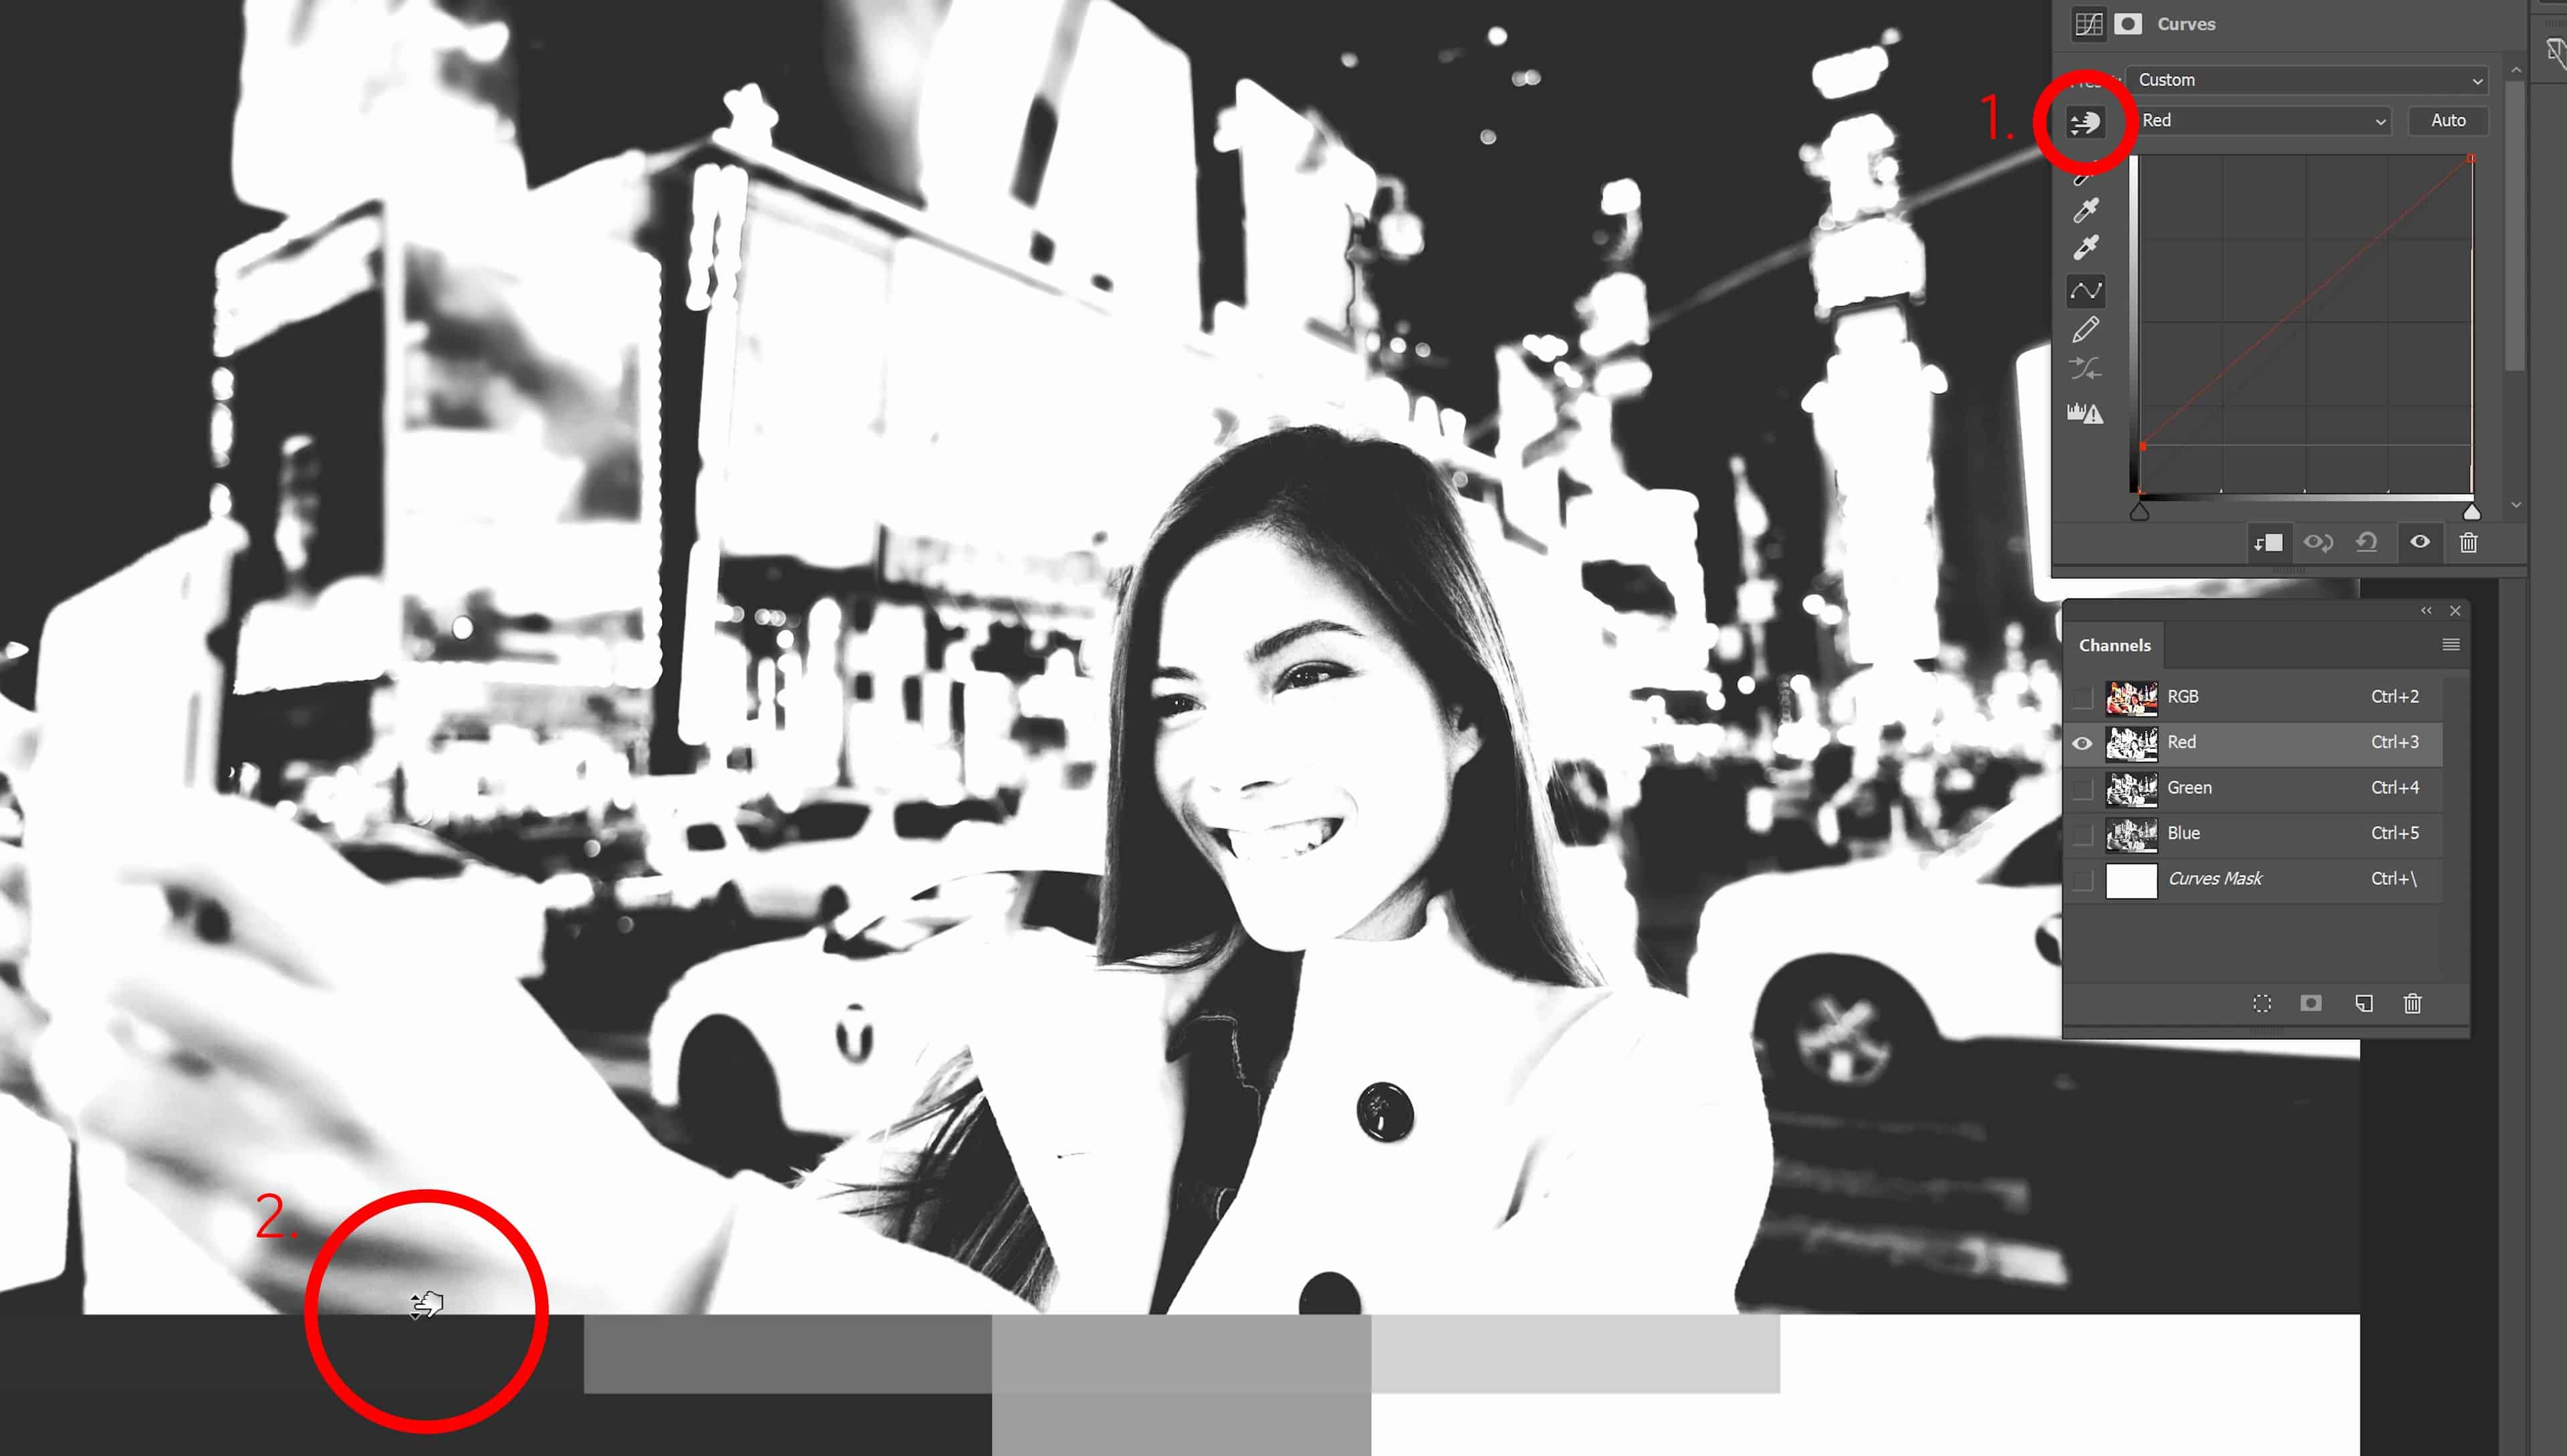
Select the Auto Select Targeted Adjustment Tool then drag vertically on the upper tone chart until it blends in with the tone chart below like this. Do this for all 5 tonal areas.
Step 8
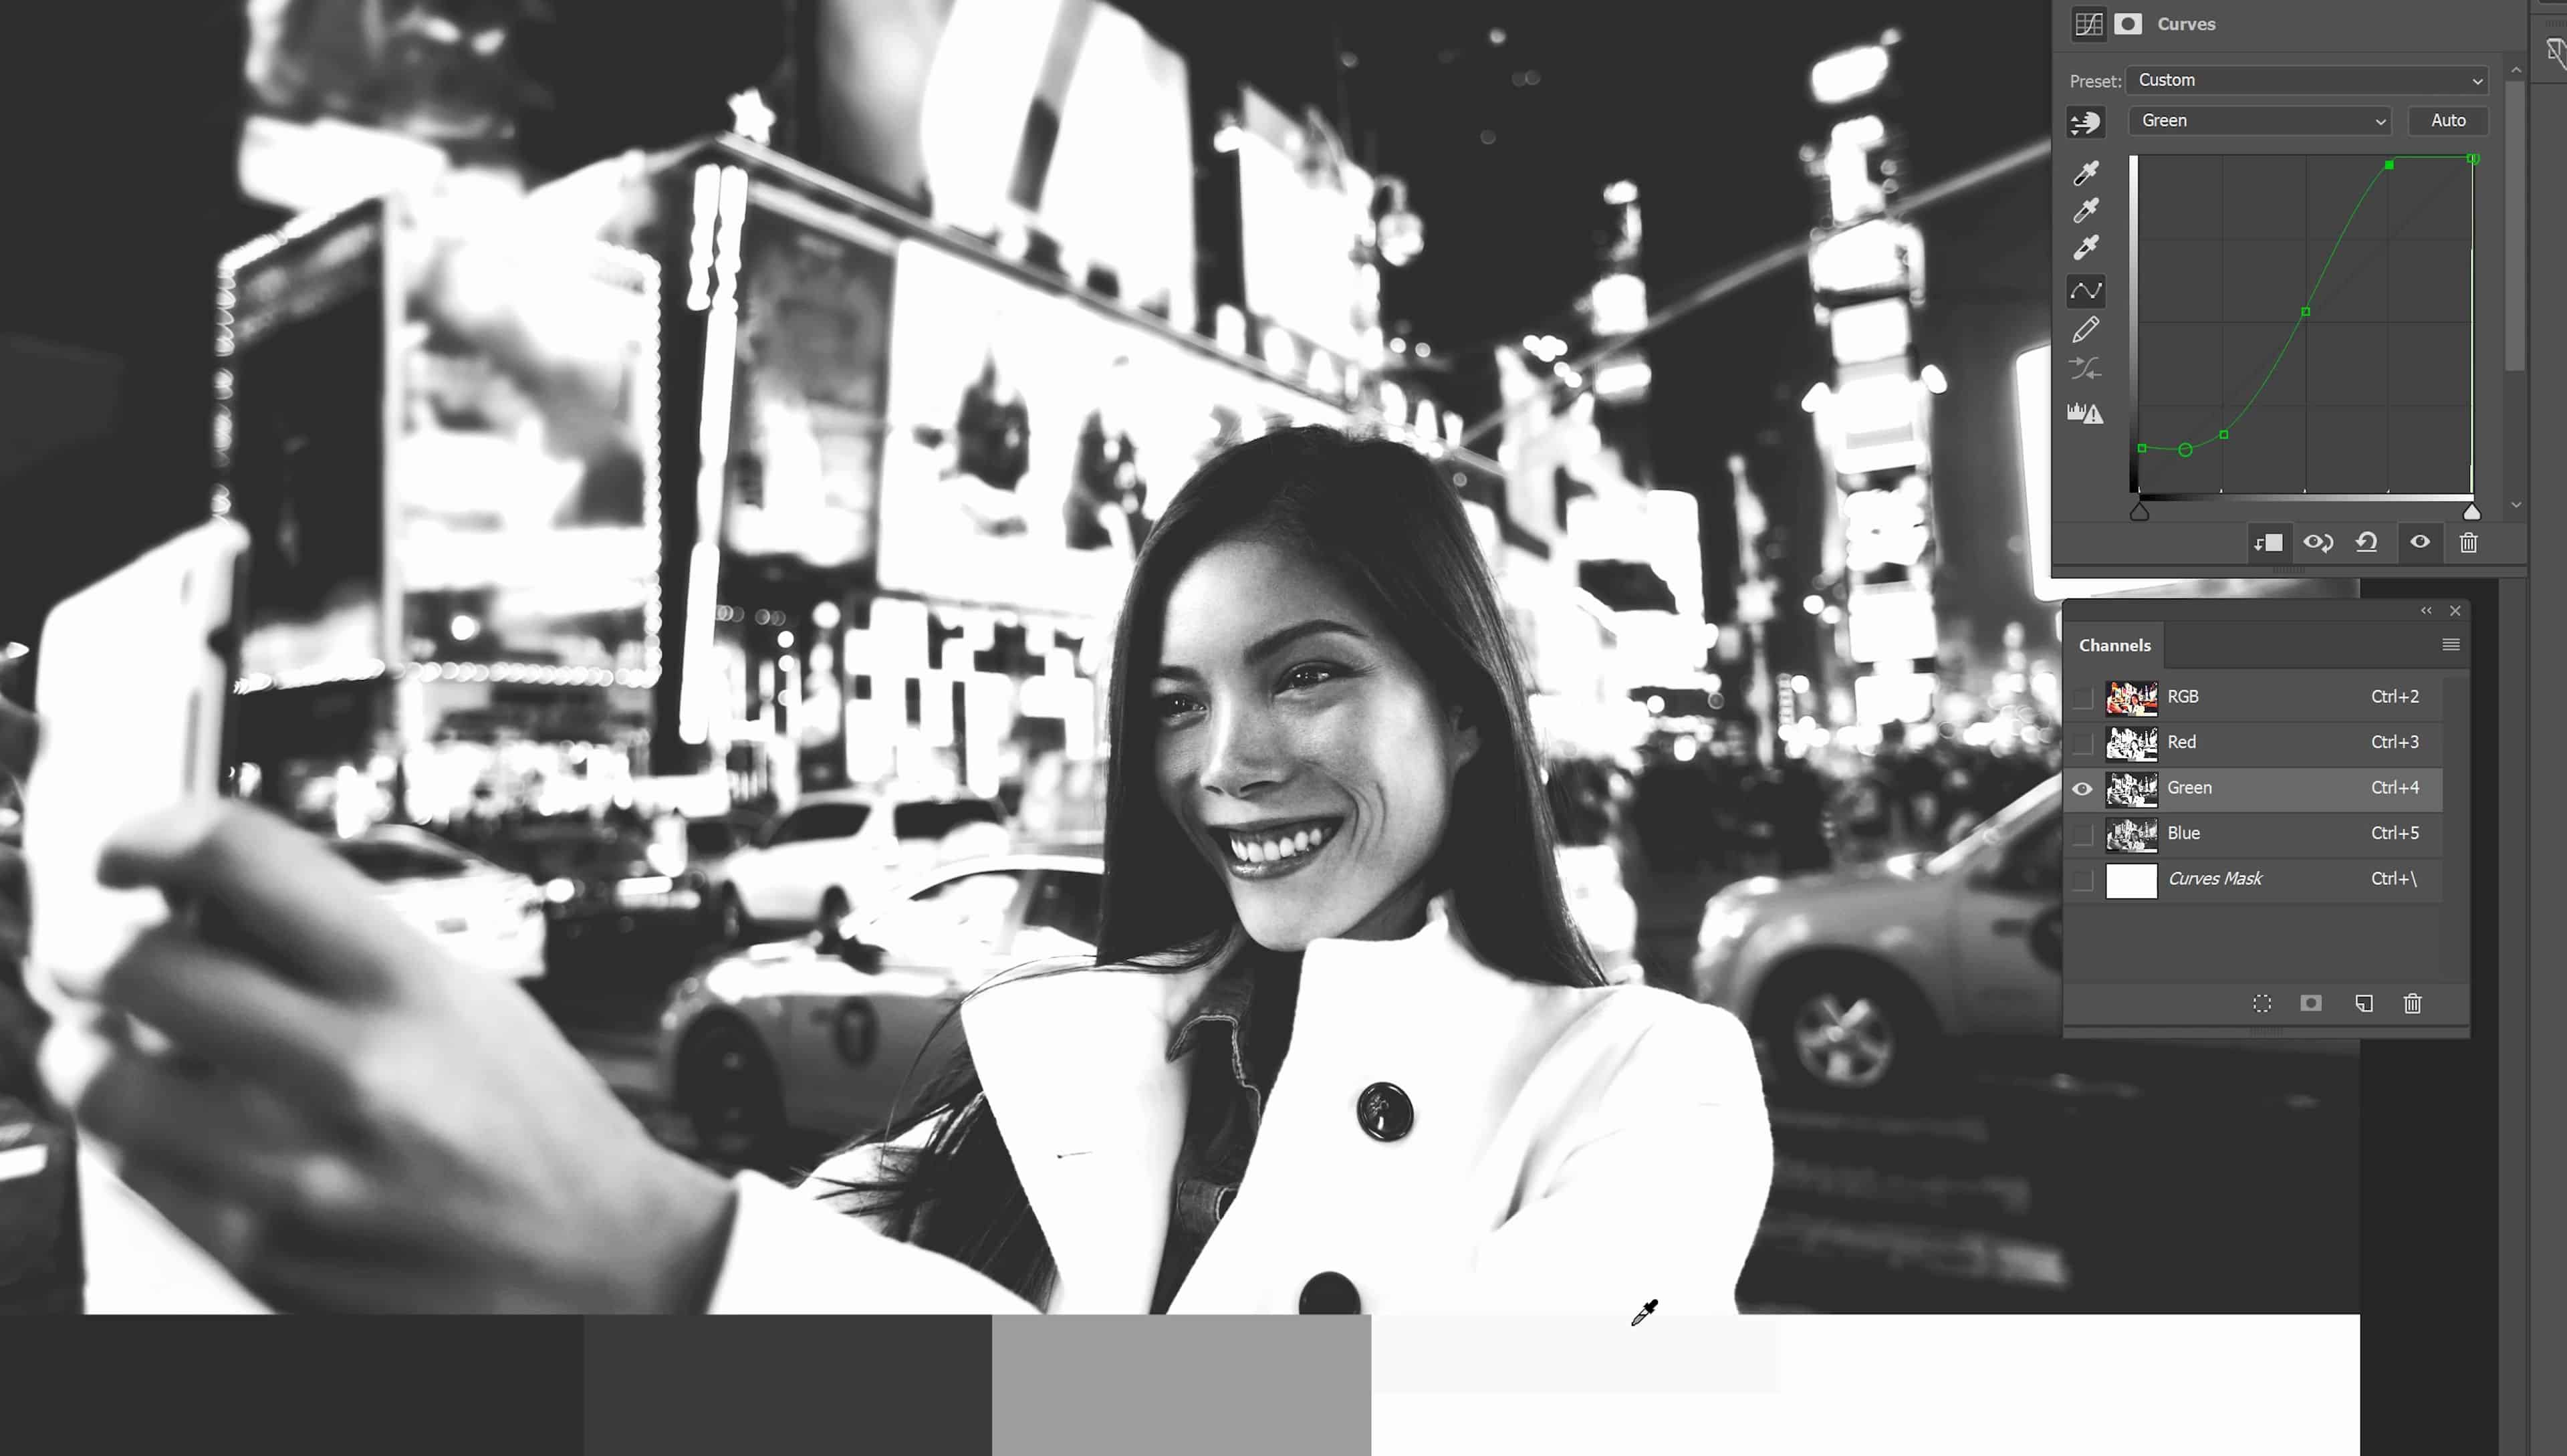
Do the same thing with the Green channel. So in the Channels panel, select the Green channel. Then go back to the Curves adjustment and switch to the Green channel. Use the Auto Select Targeted Adjustment tool to do the same thing and make the upper chart blend in with the bottom chart.
Step 9
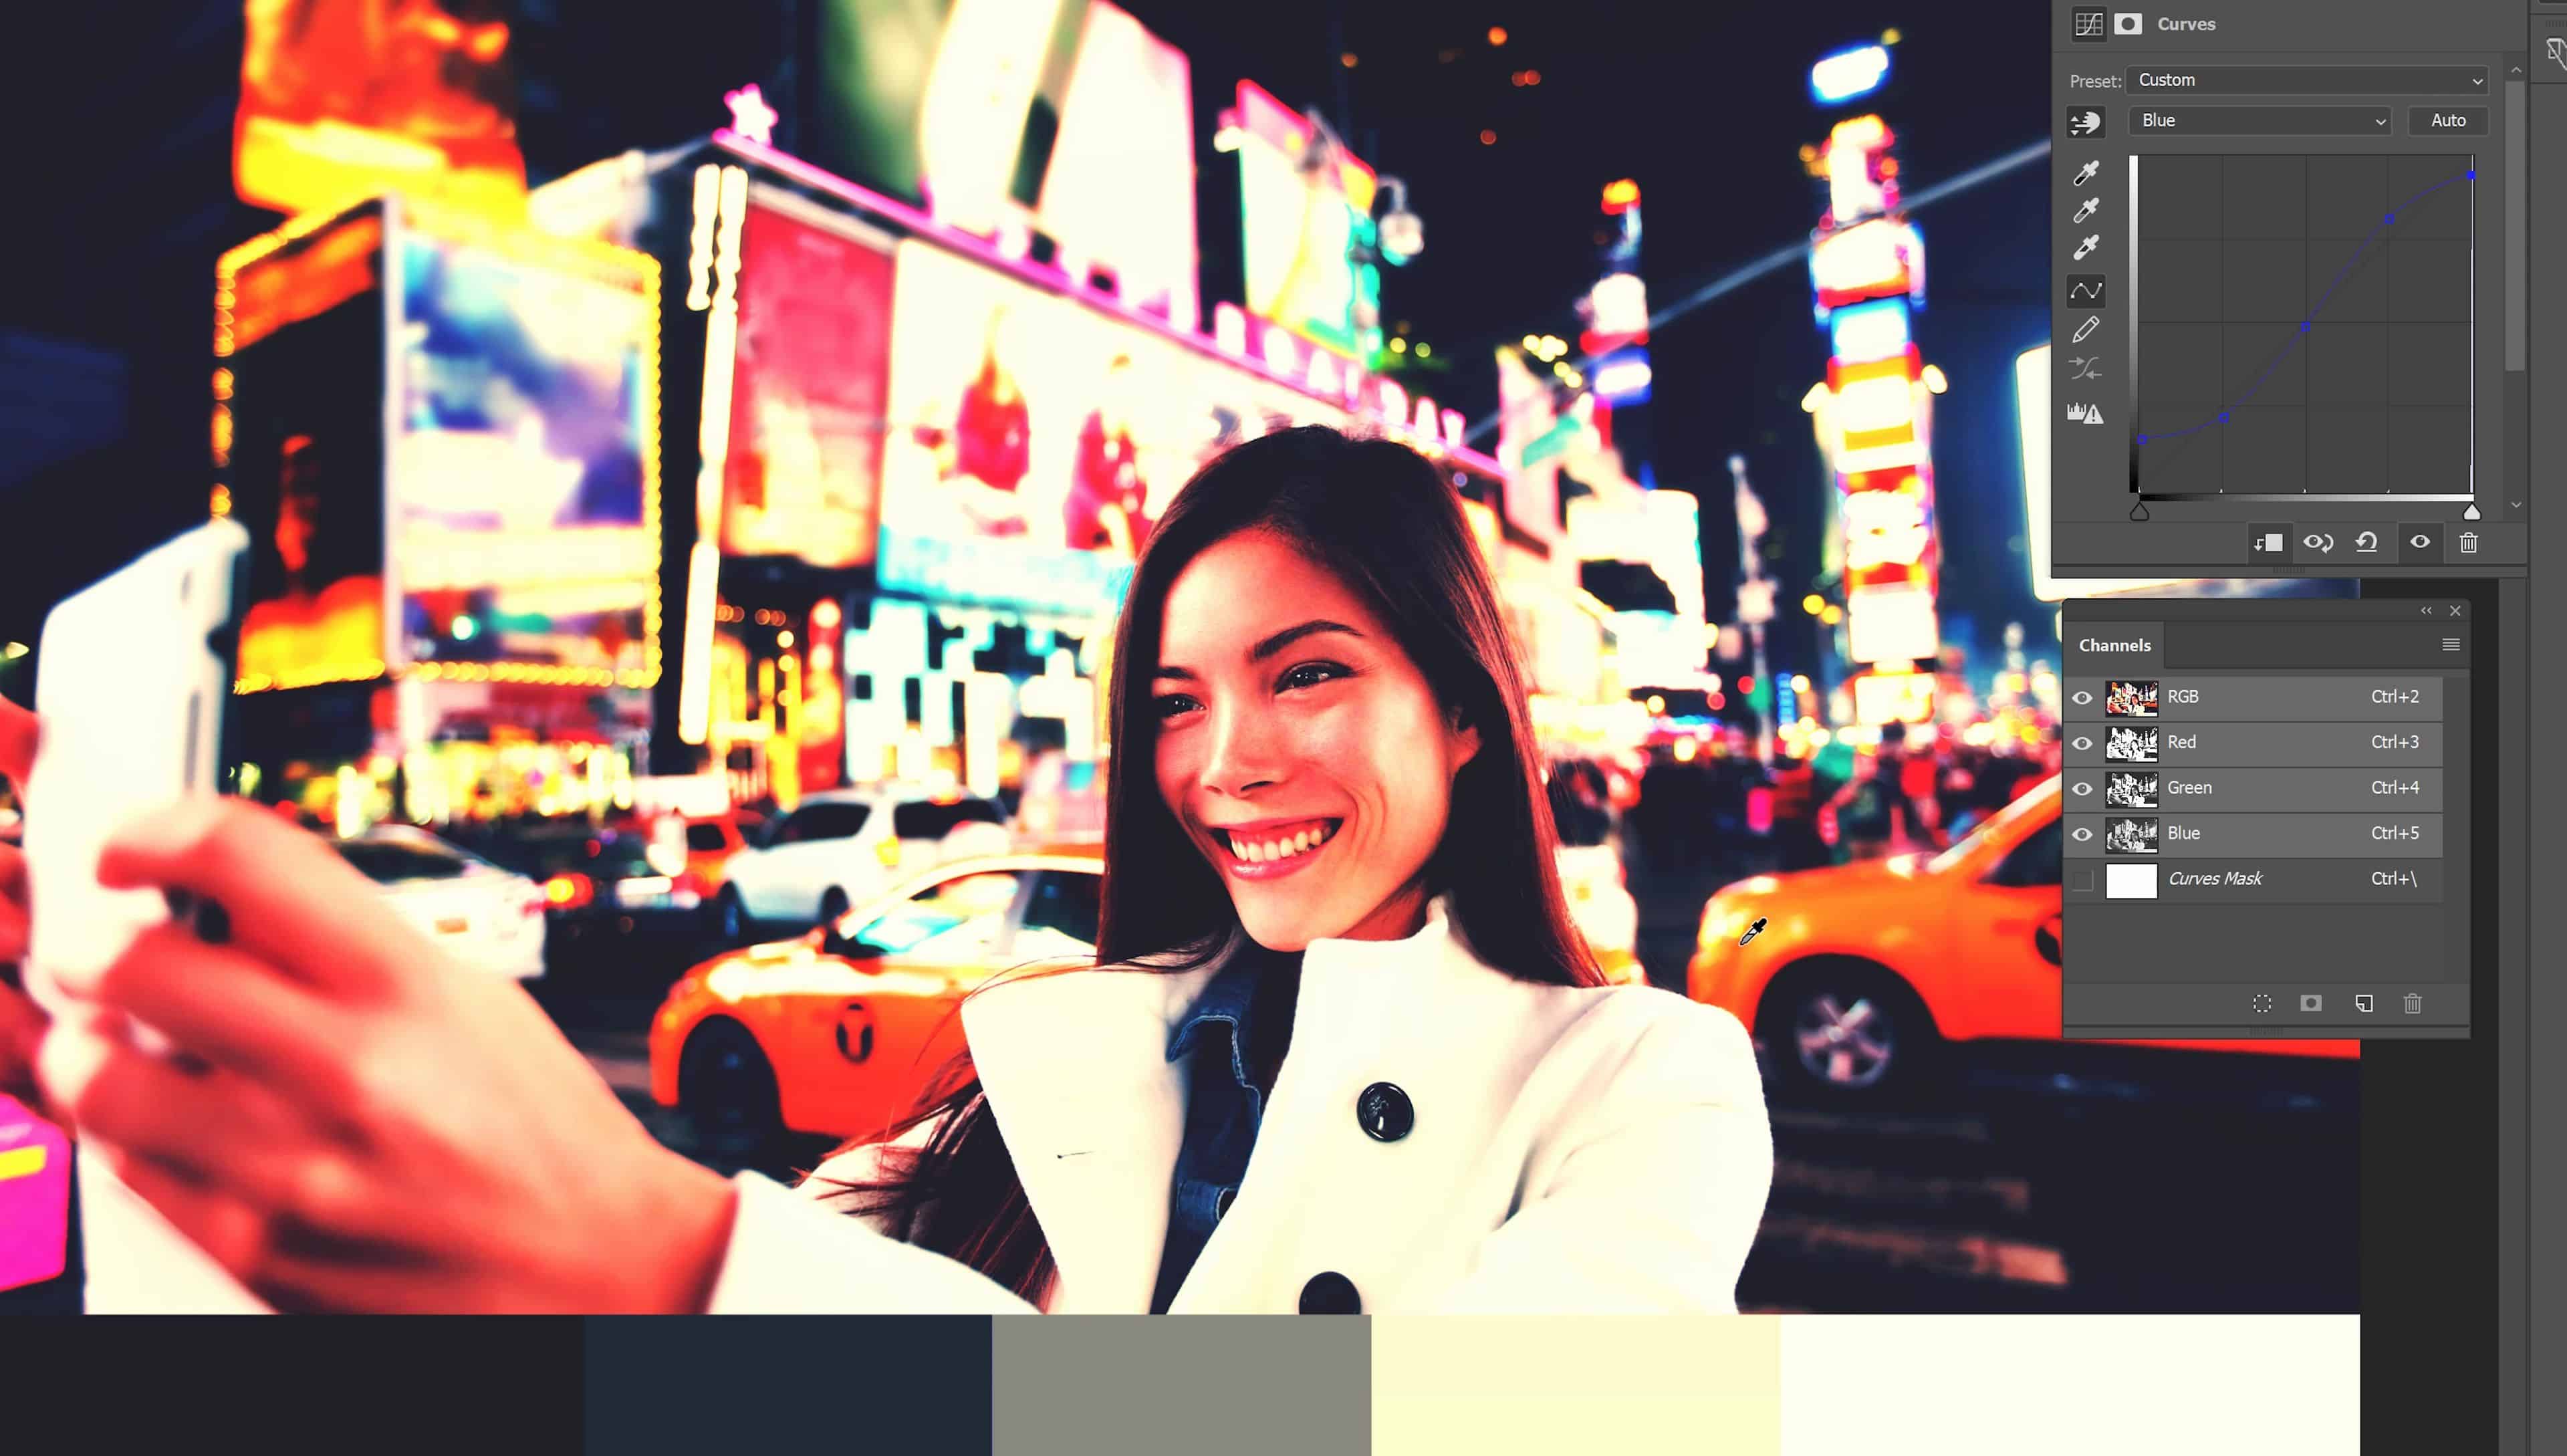
Finally, we’re going to match the blue channel. So in the Channels panel, select the Blue channel. Go back to the Curves adjustment and switch to the Blue channel. Make the upper chart match with the bottom chart.
Step 10
Switch back to the RGB mode in your Channels panel and your upper chart should look like the bottom chart. If it does, congratulations because you just learned an awesome new trick with the tone chart.
Step 11
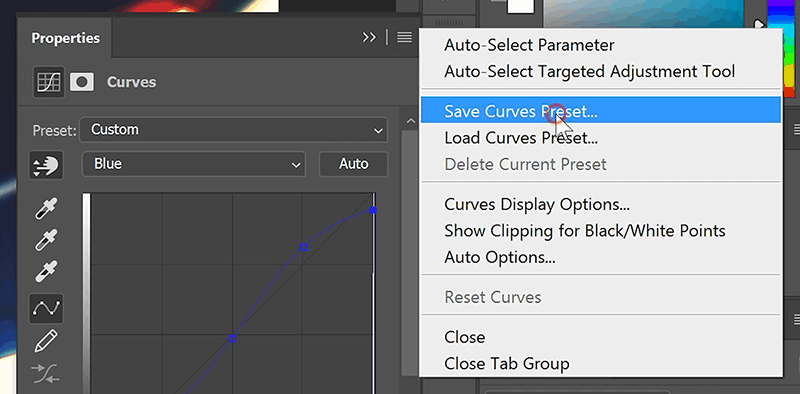
Before we finish, it’s a good idea to save your curves as a preset. Click on the Properties panel menu and select Save Curves Preset. Give it a name then click OK. You can now access this curves at any time from the presets drop down menu.
Final Results
Here’s how the image looks like before and after with just the tone curves.
Also, here’s a comparison of the effect. They’re almost the same but something to notice is that the tone curves has better image quality. The image on the left is the one created with many layers and the one on the right is the image processed with just one curves adjustment layer.
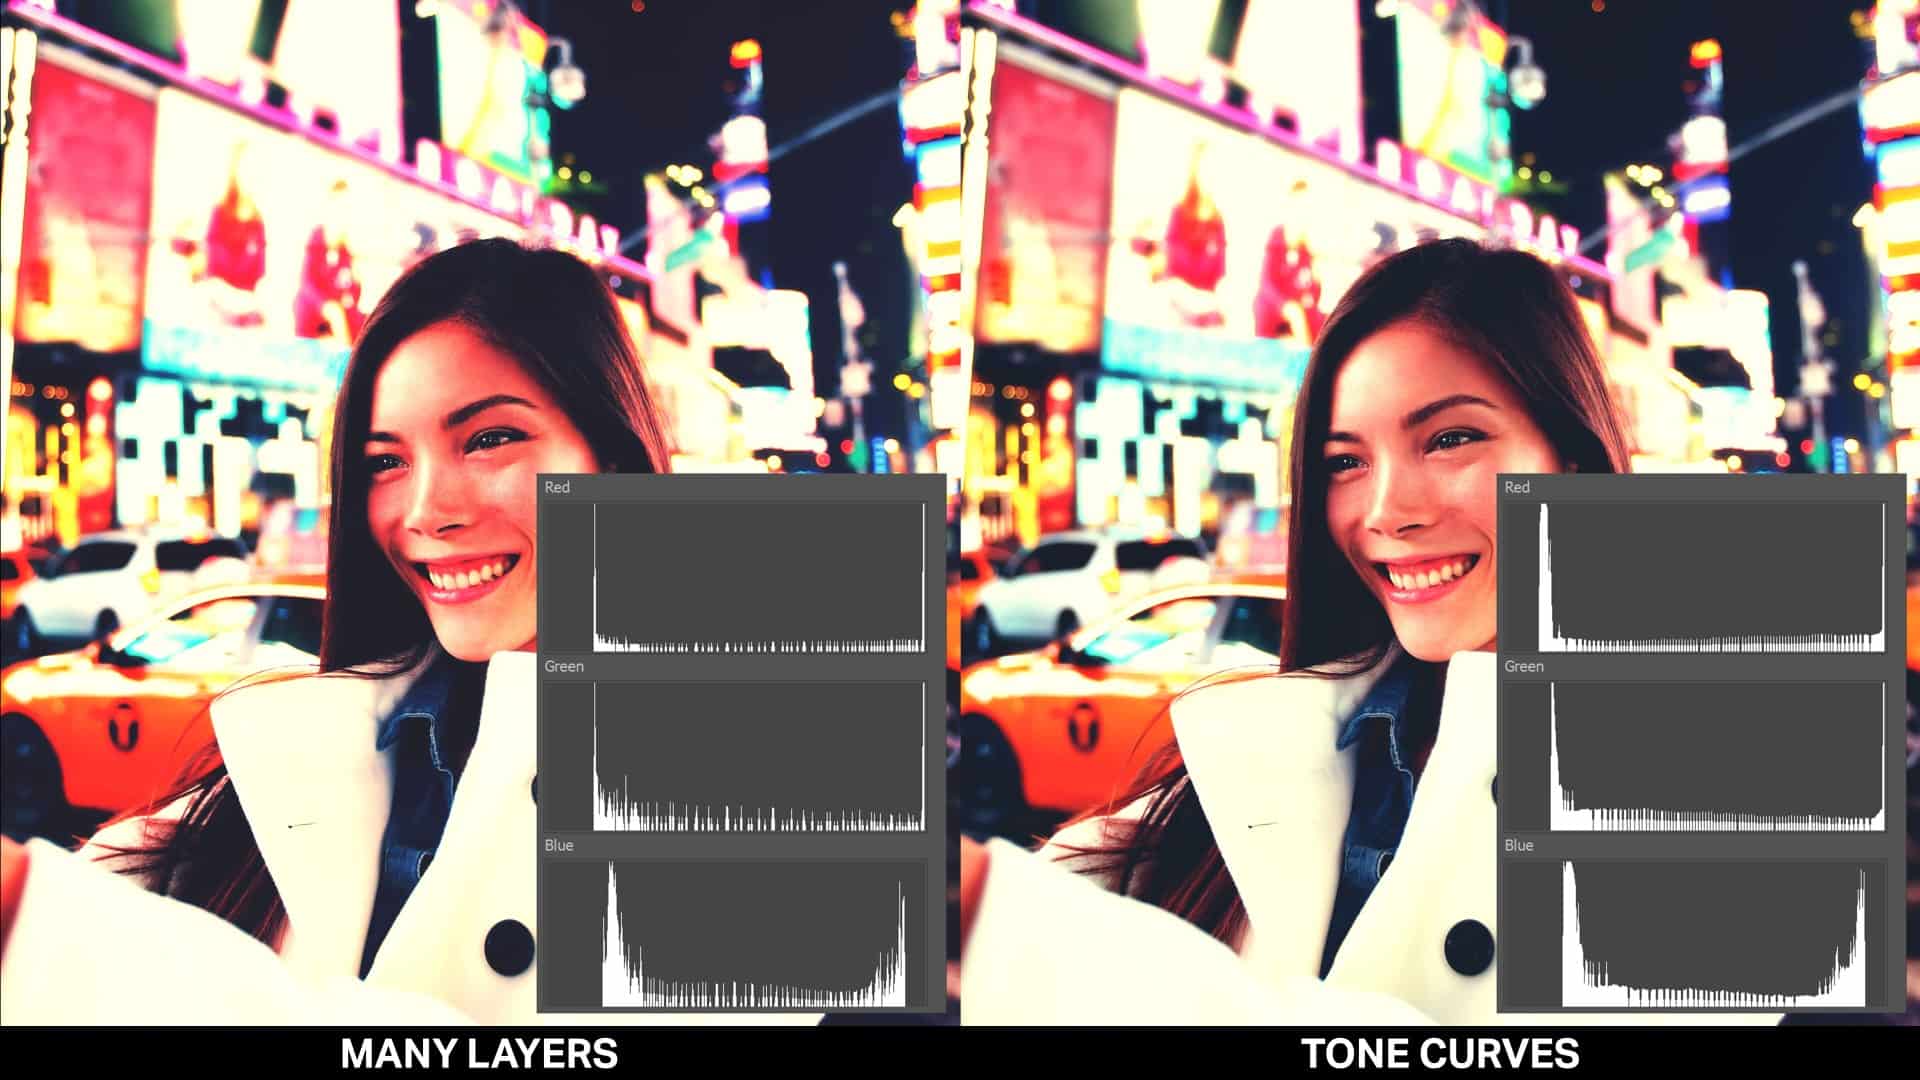
You’ll see in the details here that the colors has a smoother transition and less of the posterized effect.
Other Ways to Use this Technique
This technique isn’t just useful for compressing down your layers. If there’s a camera app on your phone and they have an effect that you like. You can save an image of the tone chart, process it in your camera app, bring it back to Photoshop, and then use this technique to recreate the effect in Photoshop. This technique is also useful for developers. For example if you’re making a camera app, you can save the tone curves and use it in your app. Tone curves is incredibly fast and efficient.